An SSL certificate is a bit of a no-brainer in most cases; it makes a connection with a website more secure, it builds trust with users (they see a padlock instead of a ‘Not secure’ message) and it’s a ranking factor in Google’s algorithm (announced back in 2014). What’s not to like?
If you’ve setup a WordPress site on an AWS EC2 instance using Bitnami’s image, here’s how to install a free SSL certificate provided by Let’s Encrypt.
As long as you have the following, it’s pretty simple!
- Your Bitnami-powered WordPress site is up and running on your AWS EC2 instance and accessible via a public IP address (guide here)
- You can connect via SSH to your server (guide here)
- You have a domain name and its DNS records are pointing to your server’s IP address (essentially creating a connection between the two)
If you have all of the above, let’s get started…
Automated Installation of the SSL Certificate
First, you’ll want to SSH into your server using a tool like PuTTY. If you need any assistance you can follow my guide here or comment below and I’ll try and help.
Once the connection is up and running, we’re going to run Bitnami’s really handy HTTPS Configuration Tool. It handles three things for us:
- Configuration of the SSL certificate
- Automatic renewal of the certificate
- 301 Redirects (e.g. HTTP to HTTPS, non-www to www)
The second point – automatic renewal – is especially important here as Let’s Encrypt certificates are only valid for three months at a time, so this will save you quite a bit of hassle in remembering to renew and then the actual manual renewal of the certificate.
To launch the tool, we have to run just one command:
sudo /opt/bitnami/bncert-tool
It may tell you that it needs to update first with a message like this:
An updated version is available. Would you like to download it? You would need to run it manually later. [Y/n]:
Just press Enter and let it update (pretty much instantly), then re-run the initial command.
The tool will then take you through several steps where you’ll need to provide the following:
- A list of the domains and subdomains that you want to include in the certificate. **Make sure that the domain’s DNS records are pointing to the IP address of your server.**
- An email address (you’ll get notified of any issues via this email).
- The option of automatic renewal.
- The option implementing 301 Redirects (both HTTP to HTTPS and non-www to www).
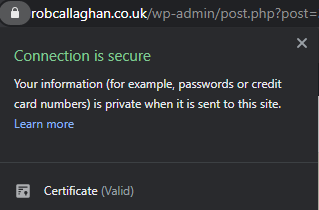
Once the tool has finished running, it should be fairly instantaneous so you can go ahead and check your site for the padlock. Clicking the padlock, you should see the following:
Manual Alternative Option
The automated solution above really is easiest way to do this and I’d fully recommend it. If, however, you need or want to go through the process manually, then Bitnami themselves can take you through the steps involved in the much longer process in their guide here.
I hope this helps! Let me know if you experience any issues or have any questions by commenting below.