I’ve never fully understood what a pull request (or PR) really was – the logistics or practicalities of it, at least. I knew it was about making changes to an existing project and essentially asking for those changes to be merged in, but I didn’t know how easy it was, the order that things need to happen, etc.
Sometimes the best way to learn is to just do it, so I did.
To be fair, this was a very simple – perhaps the most simple – pull request you could do, but that’s OK because it gets you started and helps to build a foundation.
After reading this article on GitHub’s blog over the weekend, one recommendation from Rizel Scarlett for how to get started was to check out First Timers Only; it provides a list of resources to help find GitHub issues you can contribute to as a relative beginner. The first resource is a repository called First Contributions which takes you through how to submit your first pull request, using the repository itself as the project that you’re contributing to (great idea).
The Steps
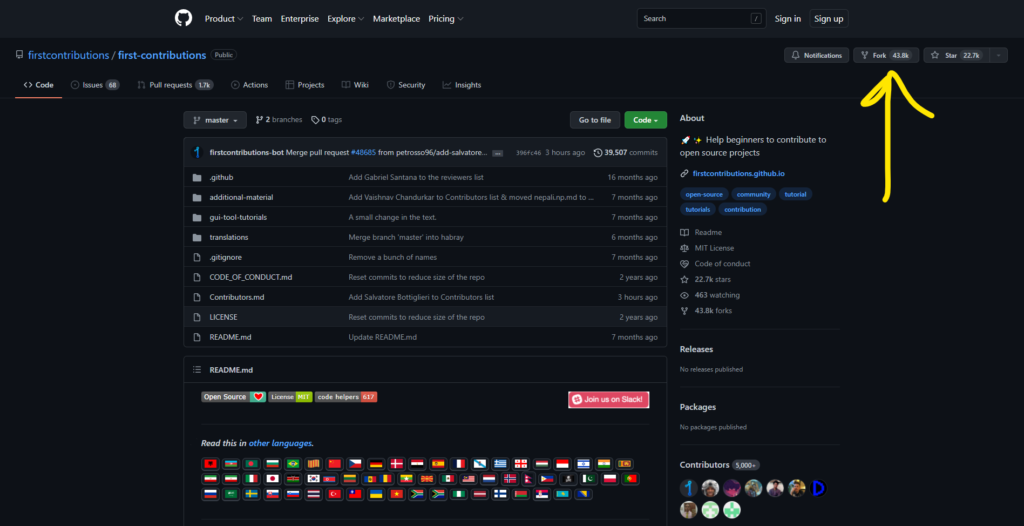
Step 1 – Fork the repository
From the repository page, click the Fork button in the top-right. This will essentially create a copy of the project in your account.
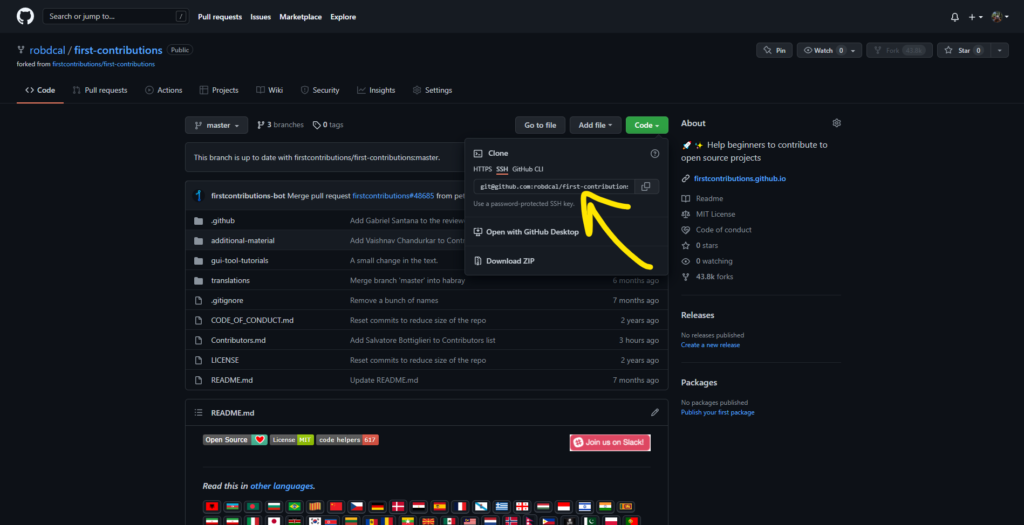
Step 2 – Clone the repository
Once the project has been copied across (it can take a few seconds), you want to pull it down to your local computer, so you need to use git clone.
Start by clicking the Code button to show the Clone URL and copy it to your clipboard.
Then, assuming you’ve got your terminal open in your desired location (i.e. a projects folder), you’ll want to run the following:
# Clones the forked repository to your local machine
git clone git@github.com:robdcal/first-contributions.git
Bear in mind that this would create a folder for you named first-contributions in your projects folder.
Step 3- Create a branch
Then you’ll want to create a branch in your local project.
# Change into the project's directory if you haven't already
cd first-contributions

# Create a new branch; in this case we're adding my name
git checkout -b add-rob-callaghan
Step 4 – Make and commit changes
Now that you’re working in your new branch, you’ll want to make the changes to the Contributors.md file, stage the change and then commit it to your local project.
# Stages the changed file
git add Contributors.md

# Commits changed file
git commit -m "Add Rob Callaghan to Contributors list"
Step 5 – Push changes to GitHub
Once your change has been committed to your local project, you’ll want to push it up to GitHub.
# Push change(s) up to GitHub
git push origin add-rob-callaghan
Step 6 – Submit your changes for review
Finally, we need to submit our pull request for review by the maintainers of the project.
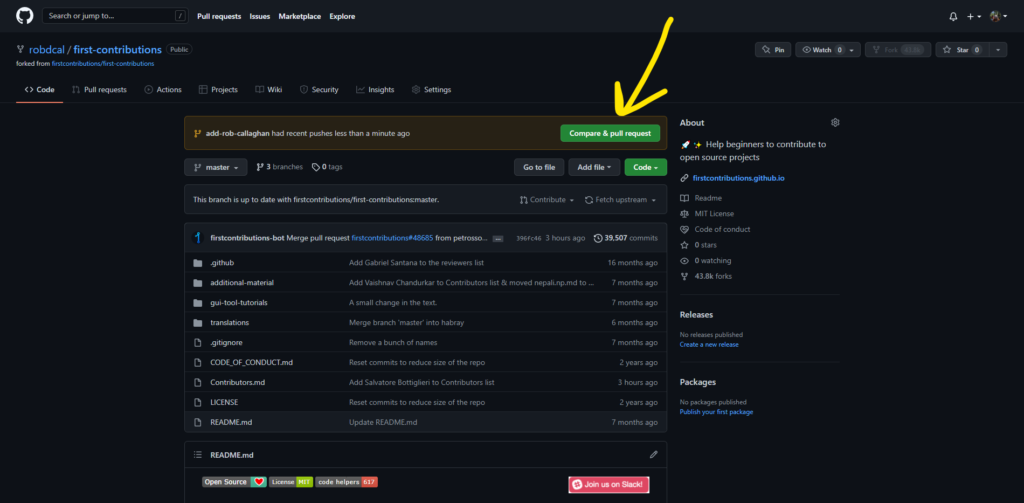
Having committed your change to a new branch in your forked repository, because the repository is linked to the original project a notification will display on both repository pages.
Click the Compare & pull request button.
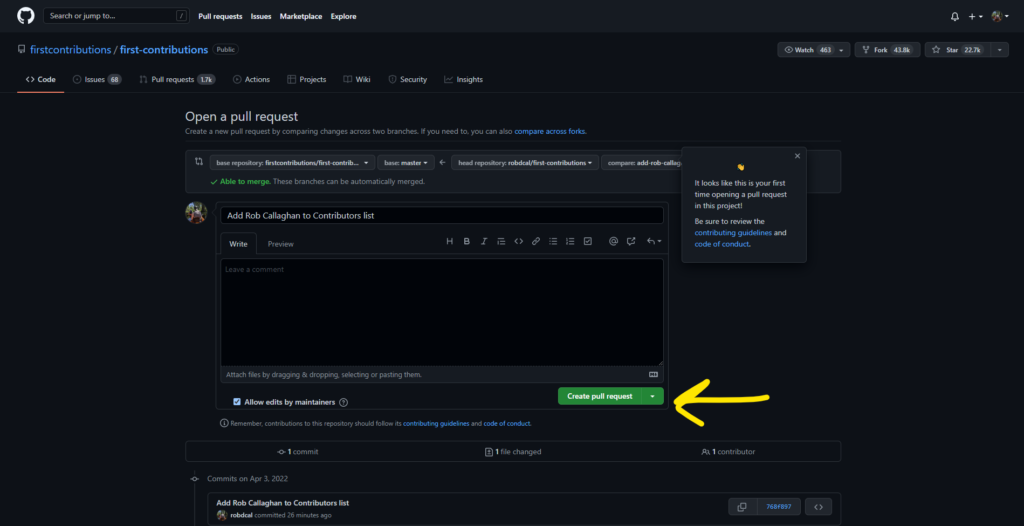
You’ll be shown the Open a pull request page which should have the title populated already with the message you put in your commit.
When you’re ready, click Create pull request.
Once done, you’ll be shown a dedicated page for your pull request (here’s mine).
Summary
And voilá! You’ve just submitted your first pull request.